Starting a new worm bin is easy and only requires a bin, bedding, some food, and yes, the worms. Anyone can learn how to do it.
But as I learned a few years ago, starting a successful, thriving worm bin from scratch where worms won’t try to escape the first night is another matter.
While the following directions are necessary, they are not sufficient to ensure you make a hospitable environment for your worms to eat, poop, and reproduce.
Vermicomposting, especially at the beginner level, is not mechanical. It requires paying close attention to conditions and using a little trial and error.
You need to see what works for you because differences in feedstock, ambient humidity, temperature, and breathability of your bin is going to affect all of the other conditions.
According to legend, Abraham Lincoln once said:
Give me 6 hours to chop down a tree and I will spend the first 4 hours sharpening the axe.
This adage holds with vermicomposting and as you will notice, I spend most of my time on what you need to do before you ever touch a worm.
With that in mind, here is a solid 9-step game plan for building your first home bin.
Note: This article is part of a “Vermicomposting 101” series of posts aimed at helping the beginning vermicomposter. The read other “VC101” articles on how to start a worm bin, how to choose worm food, how to maintain moisture, and the differences between composting and vermicomposting, please visit the Vermicomposting 101 section of this site!“
How to Start a Worm Bin: 9 Steps to Vermicomposting Success
Step 1: Select Your New Worm Bin
Surprise! One thing you need when you start a home bin is……well…..the bin! There are several commercial bins on the market, to include:
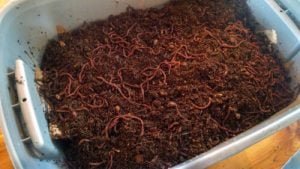
- The Urban Worm Bag
- Can o’ Worms
- Worm Factory 360
And there are some cheaper options, particularly a 10-to-18 gallon Rubbermaid bin or a simple 5-gallon bucket, both of which will need holes drilled in the top 6 inches of the sides or on the lids to allow your new bin to breathe.
You can also use a screen material as part (or all) of the top of the bin.
For simplicity’s sake, we’ll concentrate on the Rubbermaid option and my personal favorite (for obvious reasons!), the Urban Worm Bag. Here are the pros and cons of each:
Rubbermaid Bin
Pros
- Cheap
- Decent surface area available
- Portable
Cons
- Poor moisture control
- Requires modification
- Castings are difficult to harvest
Urban Worm Bag
Pros
- Breathable, maintains excellent aerobic conditions
- Castings are easy to harvest
- Zipper top makes feeding easy
- Free shipping and a lifetime warranty
Cons
- Somewhat more expensive
- Can dry out in arid climates
Step 2: Add Bedding and Make the Worm Bin a Home!
Once you have the bin, the next is to dirty it up a bit and start adding your bedding. Now, the best way to start a new worm bin is to steal some of the contents of another bin. (Because, if you’re not cheating, you’re not trying!)
Transplanting an existing hospitable environment rich in microbes into your worm bin is a fast way to turn your worm house into a worm home. So fast, in fact that I think you could shorten your timeline by 10 days or more.
It won’t take too much though. Whatever volume of bedding you were planning to start with, you could probably substitute 25% of that planned volume with existing vermicompost and fill the remaining 75% with new bedding.

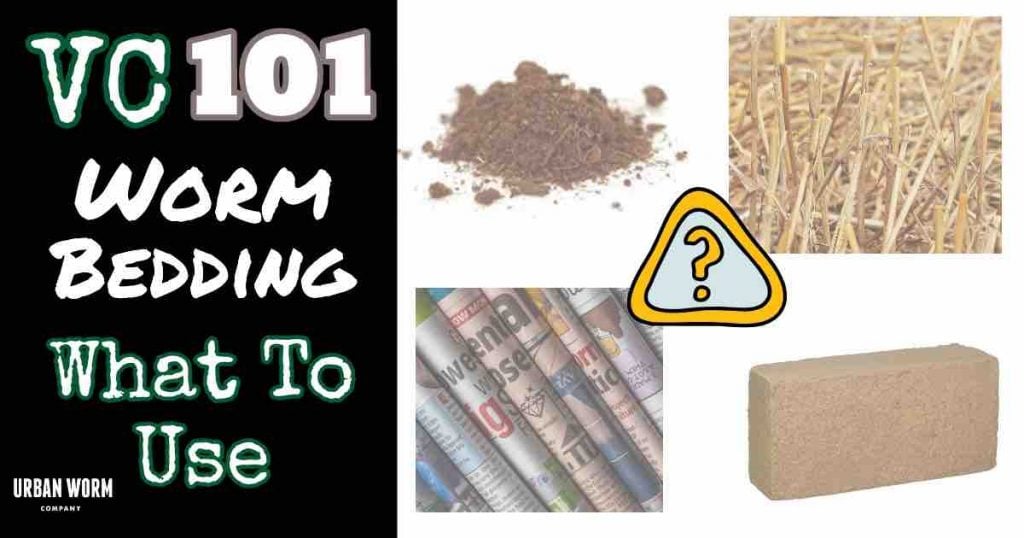
In my opinion, the best worm bedding, with or without first inoculating your bin with vermicompost, is aged horse manure. It is rich in microbes and seems to be a good mix of carbon and nitrogen, without being too rich in either which makes it a great “dual purpose” medium as a bedding and secondarily as a food.
There are downsides to horse manure though. If you’re using manure collected from a field, rather than a stall, you will often find rocks, weeds, rope, and other random things that aren’t quite horse manure.
And if you’re preprocessing manure with a chipper shredder or a grinder of some sort, those rocks could destroy your equipment. Weed seeds will also make it through a horse’s gut and remain viable in aged horse manure unless it was thoroughly precomposted.
If you do use horse manure, I would get enough to form an 8-inch layer in whatever bin you’re using and spray it down as needed until it has the feel of a damp sponge….moist, but not dripping water either.

If you can’t procure any horse manure, then I would find as much paper, newsprint, and corrugated cardboard as you can get. Shred it, then soak an appropriate amount for 24 hours.
Simply spraying down shredded paper products will not cut it. You need to allow them achieve peak saturation. So after a 24 hour soak, wring out your saturated paper and cardboard bedding to achieve the “damp sponge” feel and place it in your bin.
This next part is sort of “anything goes,” and sounds like an afterthought, but the more I think back on my own experience, it is critical if you’re starting a bin from scratch without existing living material like horse manure or vermicompost.
So if you can’t import an ecosystem, you’ll need to do your best to simulate one by adding small amounts of the following material to your bin along with your bedding:
- Soil
- Dead or composted leaves
- A small amount of sand or limestone
- Anything you wouldn’t mind finding in your garden, basically
This creates a diverse, heterogenous mix of different substances with differing textures and physical properties, different states and rates of decomposition.
If you consciously try for an “all of the above” when building your worm habitat, the chances of getting it all wrong are greatly reduced.
Step 3: Get the Microbes Blooming!

So we’ve created a cozy home for your worms, but it’s not move in ready yet. We
have to get the microbial party started by adding some worm food that will decompose fairly quickly.
A lone banana peel or apple core will do the trick. If a microbe population is like a fire, then that banana peel is like one of those starter logs that will really get things going.
You’re probably thinking “Hold on a second. I’m starting my bin from scratch. Why am I feeding my bin if I don’t even have worms yet!”
I know. We’re getting there.
Step 4: Order Your Worms
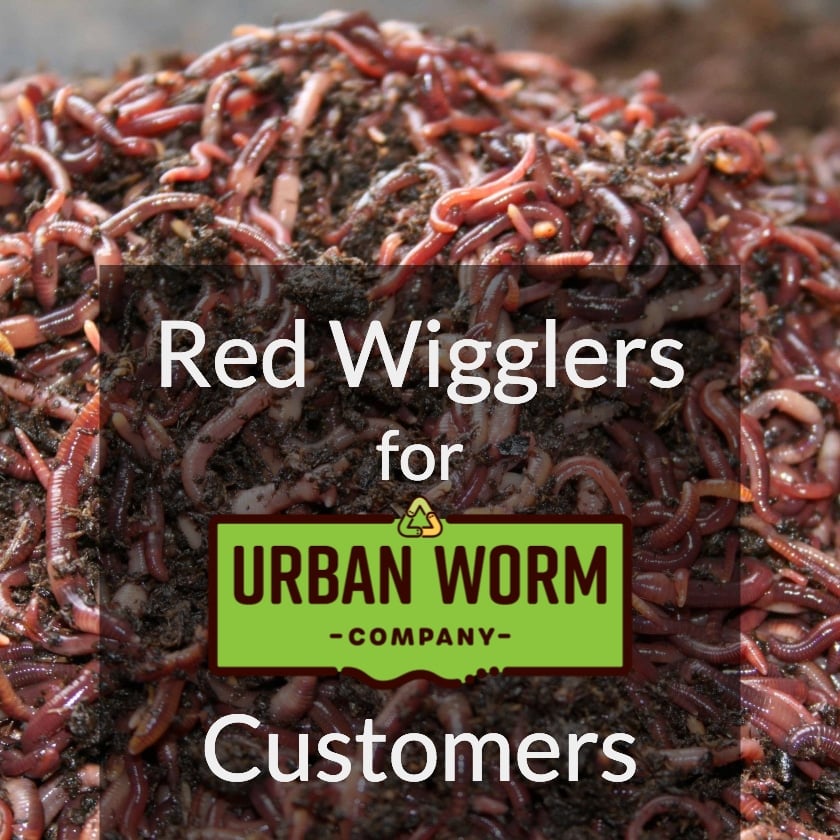
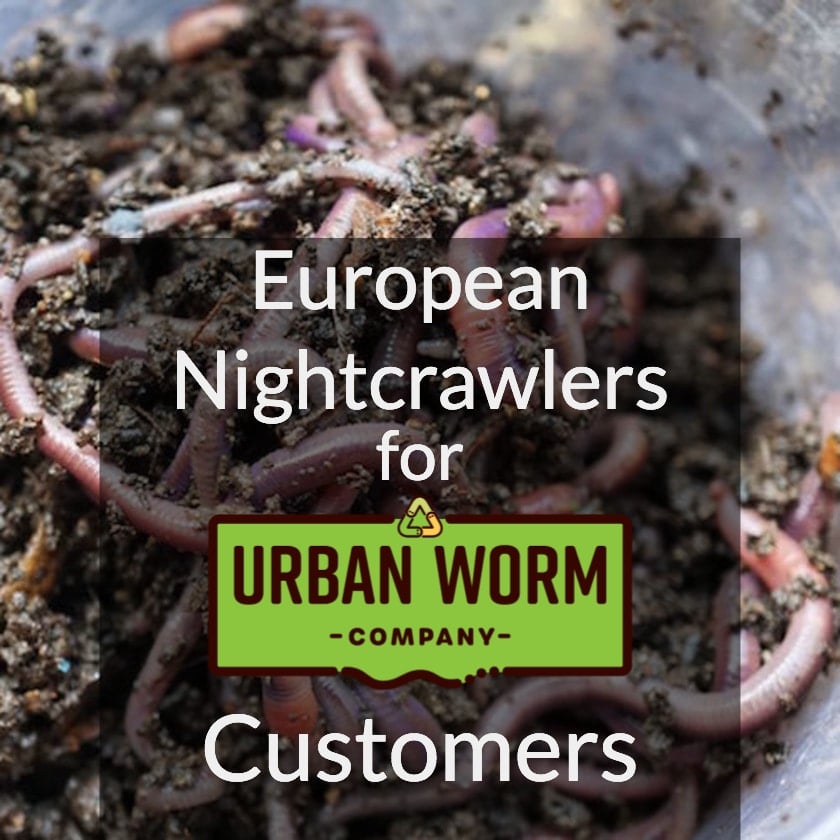
Head on over to the Urban Worm Company and pick up a pound of Red Wigglers or European Nightcrawlers or find a trusted supplier in your region who can supply them.
Note: It is common practice for worm suppliers to only ship on Mondays or Tuesdays to prevent worms from sitting in post office warehouses over the weekend.
And their cutoff time for a Monday shipment will often be the previous Friday or Saturday. So if you find yourself ordering worms on a Monday, it is highly likely that your worms won’t ship until the following Monday.
Step 5: Wait
If you have started with a bedding other than aged horse manure or an existing worm habitat like vermicompost, then I can’t stress this point enough.
What we want is an environment rich in microbes that the worms will want to hang out in and eat their 5 little hearts out. A new plastic bin with some wet paper and a fresh banana peel is not going to do the trick. You need to allow the microbes to bloom.
Step 6: Introduce the Worms to the Bin
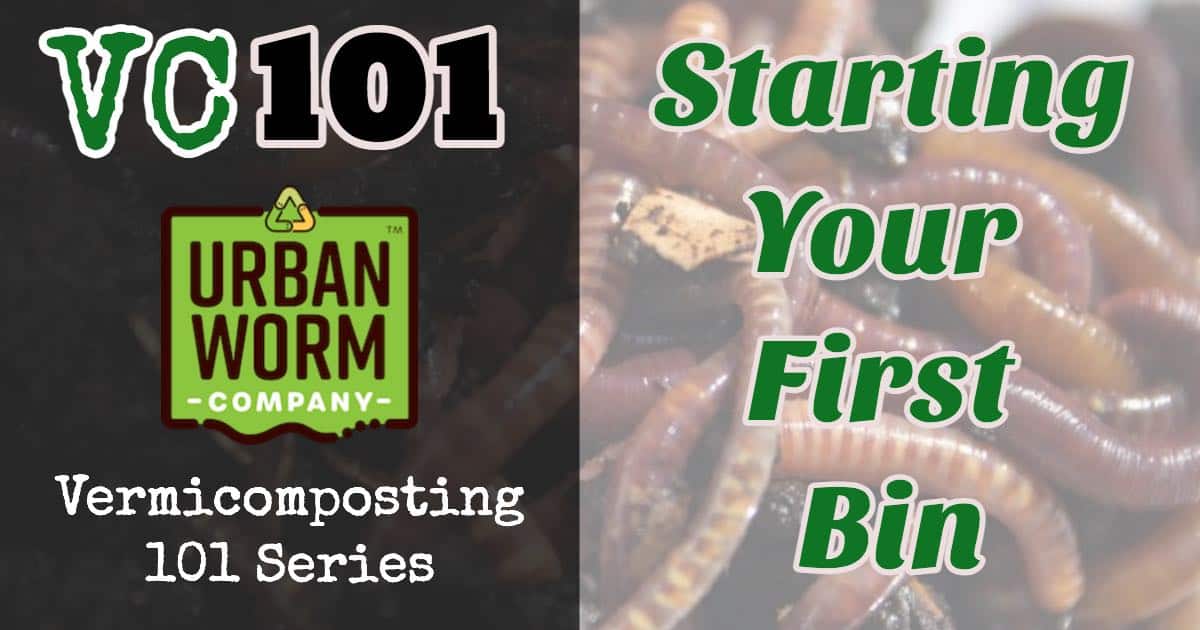
It’s move in day for your worms! Just drop them in, and help tuck them into their new bedding by keeping your bin (with the cover off) under a bright light for the first night. Worms do not like bright light and will make their way below the surface to escape it.
This greatly reduces the chance of a mass jailbreak in the first 24 hours.
Step 7: Wait Again
Now that the worms are cozy in their new home, you’ll probably be tempted to feed them immediately. Resist this urge because if you’ve prepared the bin correctly, they will have plenty to eat in their new habitat.
Just give the bin a week to settle in. Keep monitoring conditions, but resist the urge to dig around to see how your worms are doing.
Step 8: Start Feeding…..Slowly
Unless you started with a leafy, woody, worm medium, the surface of your worm environment may start to look like the top of a billiards table as the worms have worked through the surface material. This is especially so if you use a layer of carpet, fabric, or cardboard on the top of your bedding and food.
I take this as a green light that it may be time to start feeding in earnest.
But even if you don’t get that “felt” appearance on the surface, your discipline in not overfeeding to this point should pay off and you should be good to go.
However, heed this advice: Don’t get roped in by trying to achieve some X% of worm weight number when it comes to feeding your worms. Rhonda Sherman, one of the preeminent academic experts on vermicomposting, says worms will eat 100-200% of their weight…..per week!
This is far, far less than the oft-repeated 50-100% per day number bandied about.
So if you’ve got a handle on how much to feed, please check out this article on what to feed your worms. If the quantity and quality of your food is appropriate, you will be avoiding many of the pitfalls of the beginning vermicomposter.
Step 9: Monitor Conditions
Without constantly disturbing your worms, it’s a good idea to keep tabs on your worm bin by monitoring the following conditions and making some sensible changes as necessary.
- Temperature
- Maintain temperature inside the worm bin between approximately 60-80 degrees F (15-27 degrees C)
- The easiest way to do this is by storing your bin inside, but if that’s not possible, keep a sheltered bin in the shade.
- Consider picking up an Urban Worm Thermometer to help monitor temps!
- Moisture
- A worm bin should be a moist, but not wet environment. Maintain moisture at approximately 60-70%. (Update: I used to suggest a higher number, but I recently wrote this blog post about how I think I was steering you wrong about worm bin moisture!)
- How you maintain a moist environment depends on ambient humidity and temperature, what kind of bin or bed you’re using, what you feed them (most fruits and veggies are 80-90% water), and how much you feed them.
- Every now and then, take a handful of your bin contents and squeeze it in your hand. It should feel have the moisture feel of a damp sponge.
- Acidity/Alkalinity
- Your worm bin’s pH should be slightly acidic and will typically remain so unless you begin overfeeding. Lime, rock dust, and/or crushed egg shells can bring things into balance if things get too acidic.
Bonus Tips for Success in Starting a Home Worm Bin
Size Matters
You will be much better cushioned against your own errors with a more expansive environment where worms can better escape the effects of overfeeding, overwatering, underwatering, or other errors you will probably make at first. Think of worm bin size as a buffer against bad things happening.
Air Matters Too
Worm composting is an aerobic process and the quality of your castings (if you intend to use them, and especially if you intend to sell them) is strongly correlated to maintaining highly aerobic conditions in your bed.
To a limited extent, a larger bin, open air bin opens up opportunities for feedstocks like limited amounts of citrus or onions that you should be avoiding in smaller, closed bins due to acidity and/or the increased risk of mold.
Don’t Feed Every Day
The worms will do just fine with a feeding every few days and if you happen to go even a couple weeks without feeding, while it’s not optimal, any negative effects are far more muted than what will happen if you overfeed them.
Practice Benign Neglect
It is is tough not to molest your worms at first. And I guarantee your curiosity will get the best of you at times.
Fun, but important, fact: the red wiggler’s bionomial name is eisenia fetida, the “fetid” part describing the smelly mucous a red wiggler can secrete when stressed or disturbed. Now I’ve never actually smelled anything bad on them, but it is known that mites will attack worms under stress.
So if your bin features mites, it’s all the better that you leave them alone.
Remember to Keep Adding Bedding
Your days of adding bedding to the worm bin are not over! While I don’t think it’s necessary to add bedding with every feeding, you ARE going to have to add bulking material like shredded paper, cardboard, leaves, and maybe even wood chips from time to time to maintain aerobic conditions.
While underfeeding has fairly benign side effects, “overbedding” has hardly any to my knowledge. In fact, once you think you’ve added enough bedding, I just about guarantee you’re OK to add a little more!
Recognize Signs of Success
Take the following clues that you’re doing something right with your worm bin:
- Cocoons are visible
- Reproducing worms are happy worms!
- Worms aren’t balled up in corners of the bin
- There may be concentrations around pockets of food that they’re destroying, though
- Worms aren’t trying to escape
- If the worms are happy on or below the surface of your bed, you’re probably doing it right!
- There’s a nice, earthy smell to the bin
- Other critters are present
- Your worm bin is an ecosystem, and while not all non-worm organisms are helpful, the fact that you’ve created a diverse environment is a good sign!
Final Thoughts on a Successful Home Worm Bin
Let’s run over the 8 steps again….
- Step 1: Select Your Worm Bin
- Step 2: Add Bedding and Make it a Home
- Step 3: Get the Microbes Blooming
- Step 4: Order Your Worms
- Step 5: Wait
- Step 6: Introduce the Worms
- Step 7: Wait Again
- Step 8: Start Feeding…..Slowly
- Step 9: Monitor Conditions
You can take shortcuts on steps 2 & 3 above in one of two ways:
- Start with already living, thriving vermicompost
…but failing #1 above…. - Start with aged horse manure
If you don’t have access to either of these, you’ll be well served by staying patient and disciplined in your approach to worm composting. There’s just no benefit in rushing it.
Need Some Red Wigglers? Or European Nightcrawlers?
While we don’t culture red wigglers ourselves anymore, our customers have been very happy with the species purity and friendly customer service offered by our preferred vendor for both red wigglers and their larger cousins, the European nightcrawlers!
Interesting article with fairly easy step-by-step instructions, although I do have a few questions. And it’s a little more complicated than the how-to beginning vermiculture videos I’ve seen on Youtube. I hope to begin this hobby/venture soon.
Vermicomposting really is simple, but there are certain ways to screw it up, namely by being too impatient! If you have questions, feel free to ask away!
I enjoyed your article which seemed very systematic and understandable, although I might have a few questions. I hope to give vermiculture a try soon.
When I bought my first pound of worms and set them up in a 5 gal bucket I left them alone for the first week, even as tempting as is was to take a peek, I left them to be. After the first week I gave them a banana peel and after that I left for vacation for 3 weeks. I did have someone look after them, but only to spray down the cardboard that I had laying on the top with a misting bottle. When I got back my worms were all happy like with no signs of stress or anything. That being said, I had followed your instructions and can confirm that that’s the way to do it. As Steve says, it’s really easy to raise them.
Great information. I had a worm bin outdoors in Las Vegas (I bought local worms and they tolerated the heat well). Only problem was, when we had a sudden rain storm, that’s when they all decided to leave. I’m considering trying again only this time keeping them indoors. My source for worms has moved away, so I’ll be starting from scratch. I’m not sure which bin to buy or construct. Our humidity is low, around 10% or less. Suggestions?
Thanks Carwin! Yes, that’s a common trait during/before thunderstorms, especially among Indian Blue Worms, which is what I expect you have.
I recommend a breathable system always, even in low humidity. For now, you might use a Rubbermaid bin system because in a few months, I will be starting to sell a breathable bin that I am currently having manufactured. If you can wait until the fall/winter, I will be offering it to my e-mail list subscribers first for a steep discount.
I don’t know the species of worm, but they looked like the red wrigglers to me. The guy who sold them to me raised them outdoors. He thought they’d all died but then later discovered many had lived. He successfully raised several generations outdoors in the Las Vegas heat and that’s what I bought. They didn’t mind the heat, but the rain…
I plan on an indoor bin this go around. When do you project your bin will be available? I’d be interested in taking a look.
Hey Carwin, can you e-mail me at [email protected] so we can chat?
Hi Steve! Good article, and you covered all the angles. Something to remember though: before you use any horse manure or stable bedding containing manure and urine, make sure you get a definite thumbs-up from the stable master that they are not feeding/dosing their horses with de-worming medicine! I had learnt the hard way and lost all the worms by not making sure before I used the bedding.
I started with the Rubbermaid bin system, and then changed toe the worm factory 360, the 360 takes up much less space, and my worms at much happier, I don’t have any escapees, which I constantly had with Rubbermaid bins
I especially like the part about preparing in advance! I’m a newbie to vermicomposting, but did a lot of reading and prepping first. I’m a woodworker and made my own stackable wooden flow-thru worm bins with hardware cloth on the bottoms and a basin with a spigot in the bottom frame to catch the worm tea and drain it off. It has a wooden lid with holes drilled in it and screen covering the holes on the inside. I’ve been composting for years outdoors and had a huge pile of last fall’s shredded-up leaves, and some aged compost. I used this, plus some shredded newspaper and shredded paper bags, to make bedding to which I added the worms. I’ll soon have access to some horse manure, but didn’t want to add this until I put the bin outdoors in the summer (it’s in my mud room right now to keep the worms warm). I let the worms adjust for a week before adding a small amount of vegetable scraps, finely-ground eggshells and coffee grounds from my kitchen slop bucket (where they age and get some microbial colonies going). So far so good! No escaping worms, and they seem to be well-distributed throughout the working bin. No fruit flies or noticeable odor, either. I just distribute the kitchen scraps on top of the bedding and cover it with a moist layer of cardboard or paper grocery bag. About the only daily thing I do is check the moisture level and mist the bedding if it seems to be drying out.
Regarding starting a new bin… as a new comer to vermicomposting, there are so many different websites with conflicting info. I wish I’d just found this site first, before I started my bin in May. I thought I’d be harvesting compost soon but the contents of my bin still look like shredded paper with some black stuff mixed in. There’s no foul order though. After reading your instructions, I see I made some mistakes along the way. I did not realize I should keep adding bedding every so often. I have prepared a second bin because I thought I’d be harvesting the first bin. I think I’ll proceed with the second bin anyhow, following your instructions. As for the first bin, since it probably is not read to harvest, I should start adding more bedding and keep feeding? When you add more bedding, should you try to mix it with the old bedding? Or just add it as a top layer?
What is the best way to prepare food scraps for the worms? I have been blending it (rather than chopping it), but this seems to be too liquid-y. So, if chopping food waste is the better way to go, about how large should the pieces of food be? Thanks!
Hi Dawn,
In almost all cases, cutting into small pieces is sufficient and I wouldn’t worry if those pieces are a half inch square or two inches square. It really doesn’t matter! 🙂
Nice article but I can’t seem to find “how long” should we wait before introducing the worms to the bedding……….
1-2 weeks is best if you can!
Starting a bin now! Haven’t gotten worms yet. Should I start monitoring the temp and moisture before introducing them, or after? Should I cut up the banana peel before adding it?
The temperature probably isn’t necessary to watch too closely, but you’ll want to make sure your moisture is correct, especially if you’re using something like an Urban Worm Bag. Most people have bins that are way too wet which makes for a difficult harvest and can lead to anaerobic (stinky) conditions. The banana peel should be fine to add now.
Please come back here when you’re ready to order worms! 🙂
Steve
Hey Steve I’m using the UWB bin for my setup with coco coir. Can I use a well sourced compost and cow manure to add to the coco coir for my worm bedding?
Absolutely! As a bedding, all manures need to be aged or precomposted, though.
Such helpful info! Thank you! I do have a few questions-
How old is “aged” manure? I live by a few farms so if I get fresh manure- would I leave outside for a few days before placing it in the bin?
How many (weight) worms would you add to an urban worm bag once the environment is ready for them?
How much food scraps can I add at once if I’m feeding weekly?
How can I make compost tea with an urban worm bag?
Thank you!!!
Srry for the late response Rachael! I address a lot of this stuff in the Ultimate Guide which you can find on my home page, but I’ll rapid fire some responses….
1) Aged would likely be a matter of 3 months rather than a few days
2) I would start an Urban Worm Bag with 1-2 lbs (1000-2000 red wigglers)
3) You want to be very conservative at first and once the bin is running, you might be able to do 7-12 lbs of food waste weekly. This number can vary a lot though.
4) Tea is not made with the Urban Worm Bag. It’s not made from any bin really. What you’re describing is leachate and is simply excess moisture (mostly released from the decomposing food waste) which leaches to the bottom of the worm bin. A properly maintained bin should not be producing this liquid on an ongoing basis.
Cheers!
Steve
Urban Worm Company
I have had a worm bin for several years. Lately I have swarms of drain flies in the bin. Does this indicate overfeeding or too much moisture?
I think so, Rebecca. What bin are you using? If it’s not an Urban Worm Bag (I presume it’s not). If it’s a stackable system with a bottom catch for leachate – and you have leachate in there – it wouldn’t surprise me if you had drain files or other critters show up.
Cheers!
Steve
Hello Steve,
I just found your website and have read many of the articles and other information you have, thank you! One question I can’t seem to find a specific answer to is the climate. I live in SW Michigan and it’s cold here. 🙂
I have not started this yet but am really thinking about doing this for myself and possibly as a project in retirement. I was thinking that I wanted to keep my worm bin in my unfinished basement in winter and outside in the other months (my hubby would not be happy with it in living area of our house.)
Is this possible? How would I go about keeping them alive in my basement? It never gets below freezing but does get very cold…there is no heat and it is concrete finished.
Thank you for your advice.
Sorry for the late reply Christina! You should be just fine in a chilly basement. Please see this video about hwo to take care of a worm bin in the winter!
https://www.youtube.com/watch?v=ZQYkDBvZw0c
Hello Steve,
I live in Western Canada, where our winters are relatively mild but certainly below the temperature that the worms prefer. If I have them outside, what are ways to regulate the temperature (basically increase it) for the bin to make sure that they’ll make it through the winter? If you’ve addressed this answer elsewhere, feel free to just point me in the right direction. 😉 Thank you so much.
Thank you!
You can help to insulate a bin using straw bales or home insulation (food-grade if it will be touching worms). Heat mats can also help. A few suggestions were made in our livestream today about dealing with hot, summer temps. Here’s a link.
https://youtu.be/bADgR6sL_s0
Hello Steve,
I found your website by entering “how to start a worm bin” and have read many of the articles and other information you have shared, thanks for the great information! I am retired and remember back in the 50’s visiting my uncle at Lake Moultrie in SC Where he kept worms in an old 16 ft. wood boat setting under a metal shed and we could harvest the worms by the thousands. I was gifted a worm bin yesterday and needed some advice on maintaining it.
Well thank you! Glad you are enjoying the content.
I’ve bought red wrigglers and made my own 3-tier layered bin.
When adding food and more bedding, do you mix all the contents together, or does the moist bedding sit on one side?
It’s best to mix the majority of the bedding in with food scraps, and then place about a half inch layer of bedding over the top of it all.